
This tutorial explains how to install and run a full Ergo node. It does not cover mining.
Node security
There are a few important aspects of node usage that your wallet and money's safety depends on:
- An Ergo node requires storing security-critical parameters in the configuration file. You should never make this file public.
- An Ergo node provides a REST API for interacting with the built-in wallet. Sensitive API methods require a security token, which should never be sent over untrusted channels.
- Access to the Ergo REST API must be restricted to known hosts. In particular, the API must not be accessible from the Internet.
Prerequisites
To run an Ergo node you need JRE version >= 8 to be installed. One way to install it is to use Oracle implementation of Java.
The next step is to download the latest Ergo client release jar file and create a node configuration file.
Note that instead of downloading the jar, you can clone the repository and create the jar yourself using SBT by issuing the sbt assembly command.
Denote by ergo_folder the folder where the jar is kept.
Running the node for the first time
Create a configuration file ergo.conf with the following text in ergo_folder.
ergo {
    directory = ${ergo.directory}"/.ergo"
    node {
        mining = false
    }
    wallet.secretStorage.secretDir = ${ergo.directory}"/wallet/keystore"
}
The parameter ${ergo.directory} points to the directory where the jar will be run from.
Open a command prompt and cd to ergo_folder. Then issue the following command to run the node for the first time:
java -jar ergo-<release>.jar --mainnet -c ergo.conf
The node will start syncing immediately after this. Wait for a few minutes for the API to start and go to the next step.
Note: You can use any name for the file instead of ergo.conf. All configuration parameters are to be passed through this file and you only need to rewrite parameters that you want to change from the default values. The above config file actually has the default values.
Compute the hash of your secret
First, select a secret to protect your API.
Then go to http://127.0.0.1:9053/swagger#/utils/hashBlake2b and call the API to compute the hash of your secret. Refer to the image below.
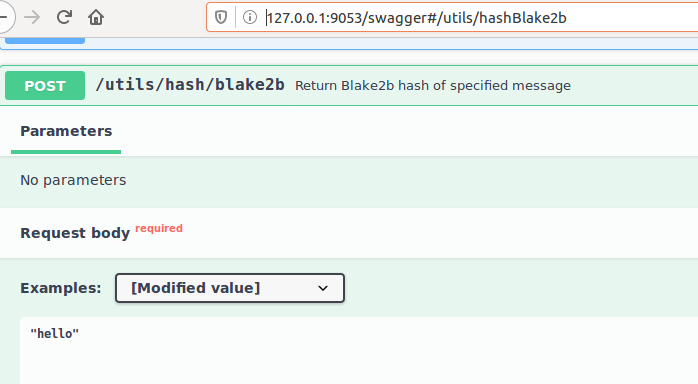
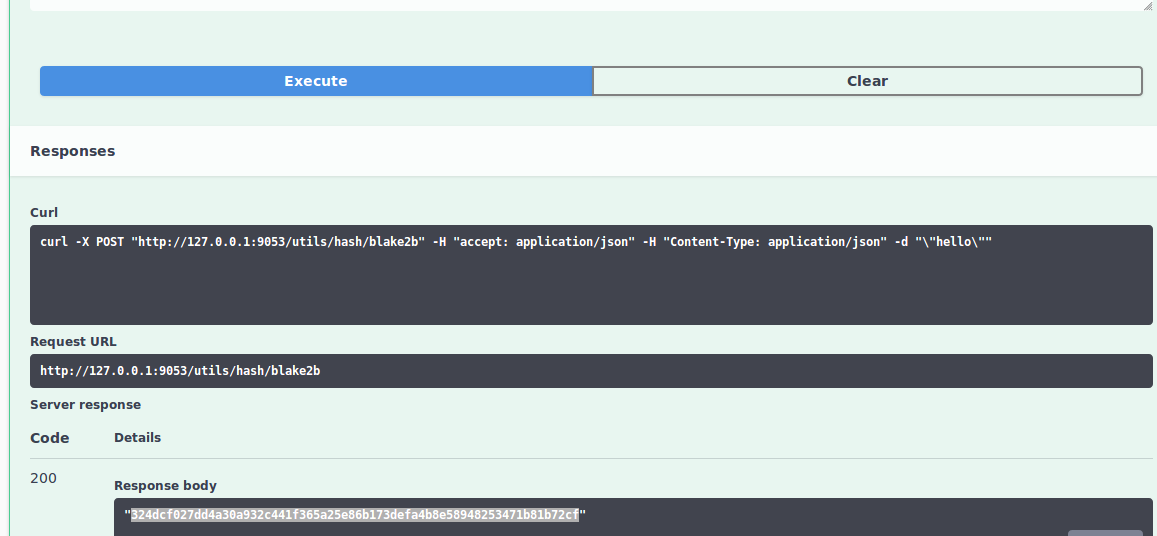
Copy the response containing the hash for use in the next step (see below image). In our example, the secret is hello whose hash corresponds to 324dcf027dd4a30a932c441f365a25e86b173defa4b8e58948253471b81b72cf.
IMPORTANT You must use a different and strong secret.
Update config file with API key hash
Edit the config file ergo.conf and paste the hash copied in the previous step. The file should look as follows:
ergo {
    directory = ${ergo.directory}"/.ergo"
    node {
        mining = false
    }
    wallet.secretStorage.secretDir = ${ergo.directory}"/wallet/keystore"
}

scorex {
    restApi {
        # Hex-encoded Blake2b256 hash of an API key.
        # Should be 64-chars long Base16 string.
        # below is the hash of the string 'hello'
        # replace with your actual hash
        apiKeyHash = "324dcf027dd4a30a932c441f365a25e86b173defa4b8e58948253471b81b72cf"
    }
}
Initialize wallet
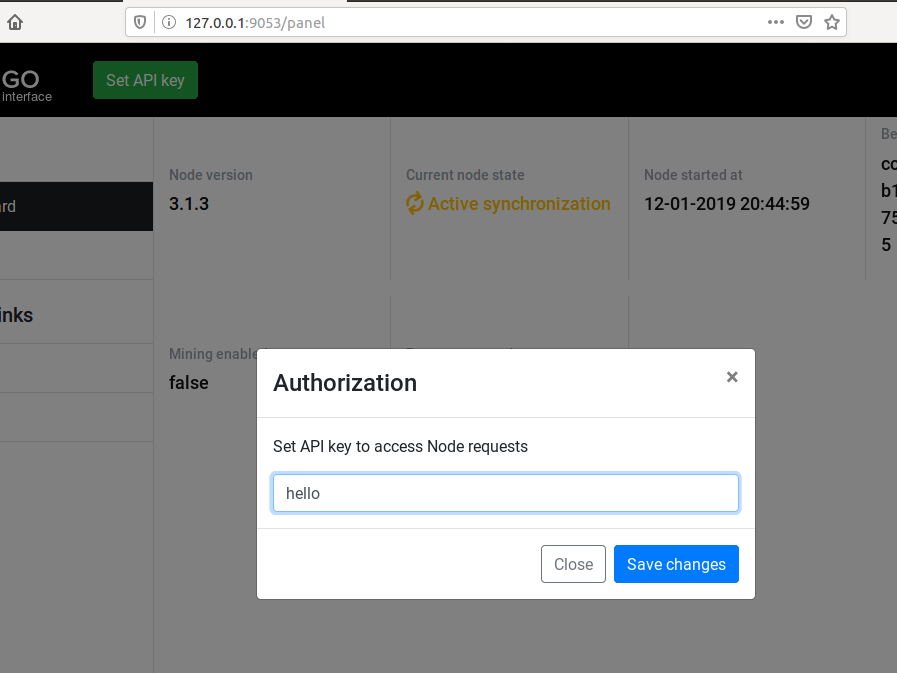
Restart the node and go to http://127.0.0.1:9053/panel to access the panel. Then set the API key secret from the previous step. Note that you need to set the secret and not the hash from the config file. In our example, this is the string hello.
Finally, click on initialize wallet:
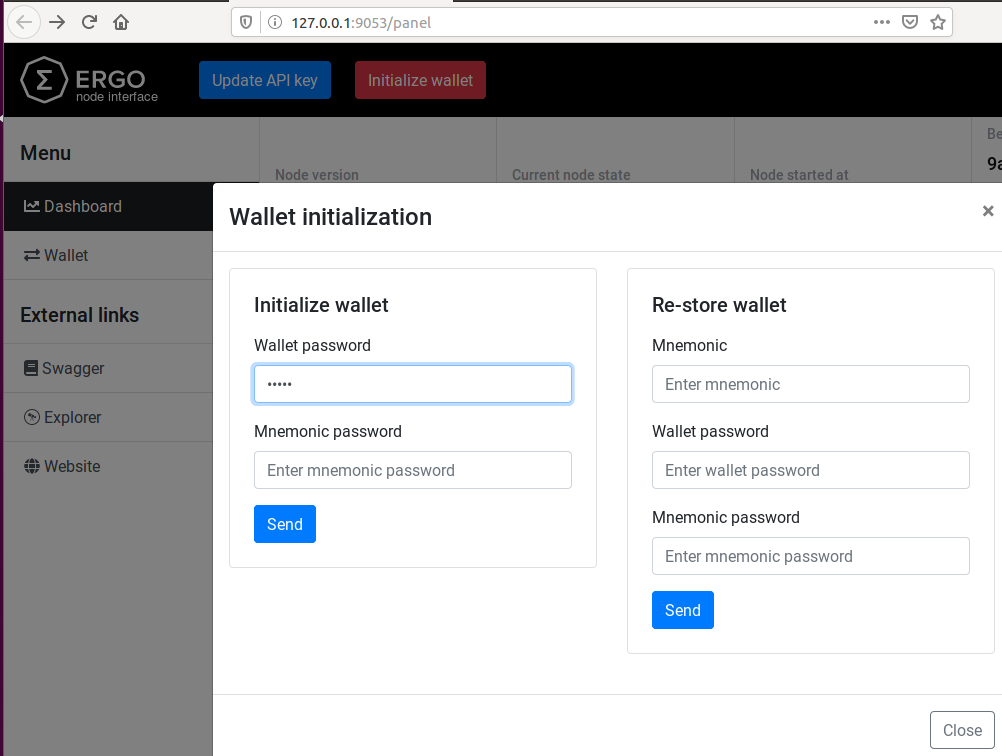
In the pop-up that opens, you must enter a wallet password. The mnemonic password is optional. After you click send, the wallet will return a mnemonic sentence as shown below.
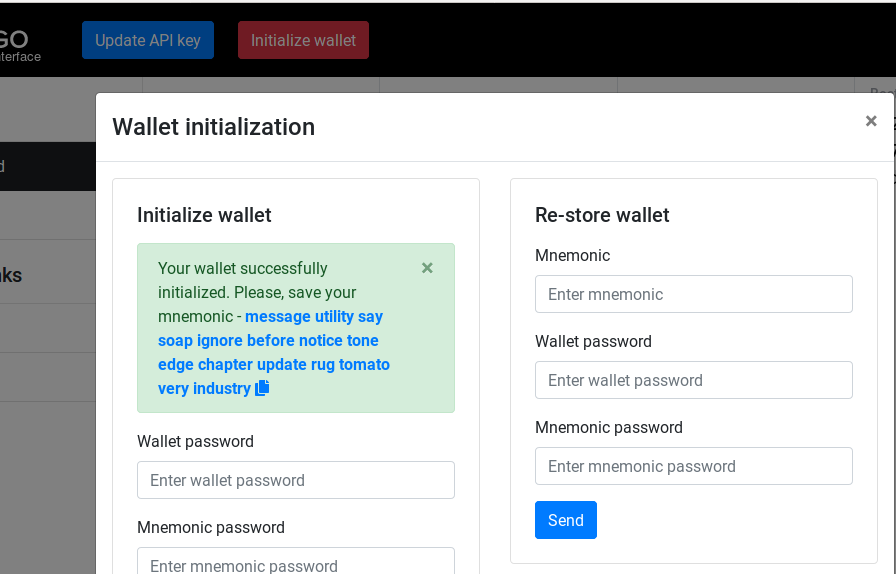
You must copy this sentence and save it in a safe place. This sentence will be needed to restore the wallet on a different computer.
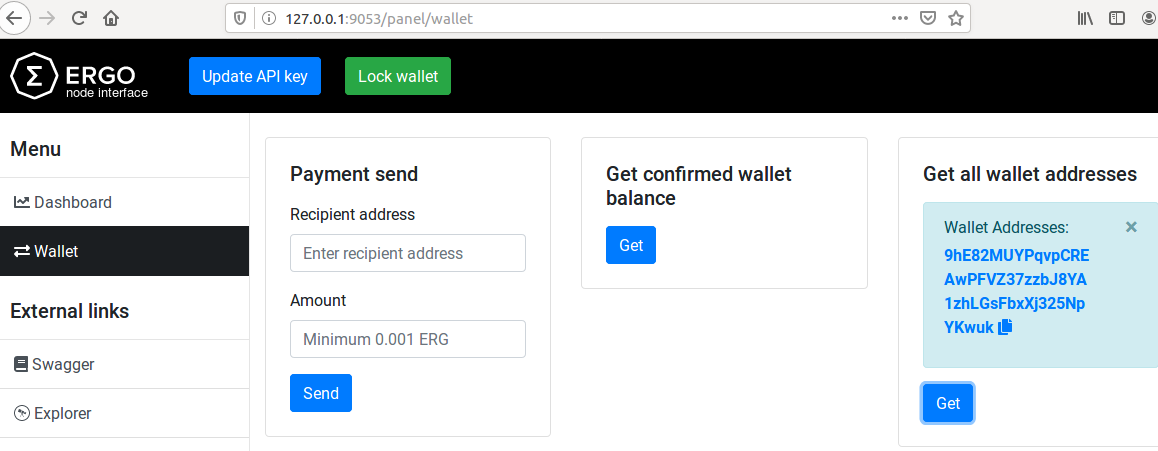
Get wallet addresses
This is a test to ensure you have set up the node properly. It will return the current addresses in the wallet.
In the panel at http://127.0.0.1:9053/panel click on the Wallet tab on the left and then on Get all wallet addresses to view the addresses currently maintained by the wallet. It should return at least one address if the node is set correctly.
Use the Swagger UI
A Swagger UI is available at http://127.0.0.1:9053/swagger. You had already used it earlier to compute the hash of your secret.
You can also use this UI to make API calls for advanced operations that are not (yet) available in the panel. Some examples of this are:
- Creating non-standard transactions with registers and context variables.
- Creating transactions that issue tokens.
- Creating transactions that use certain boxes as inputs.
A future article will discuss each of these operations in detail.
Note that most methods in the API are protected and you would need to use your secret (from earlier) to access these methods. The following images show the process of setting this secret in the Swagger UI.
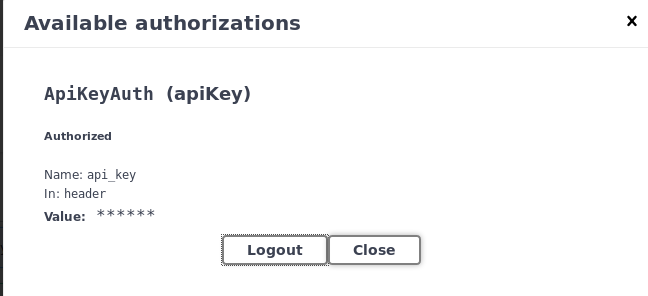
Navigate to the top of the page and click the "Authorize" button. Enter your secret in the form that pops-up as shown in the figure below.

After the password is entered and you have clicked "Authorize", you will be shown the popup below:
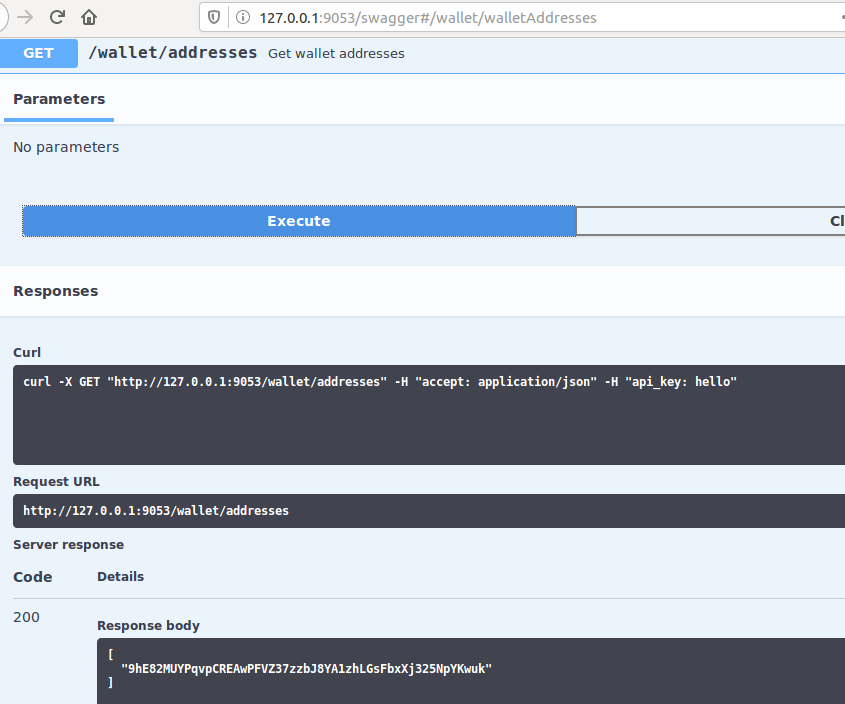
Now navigate to http://127.0.0.1:9053/swagger#/wallet/walletAddresses and click on "Try it out". You should see the same list of addresses as you saw earlier from the panel.

Share post
November 28, 2025


November 24, 2025


October 12, 2025

September 30, 2025


August 13, 2025


July 9, 2025

May 12, 2025


December 9, 2024


